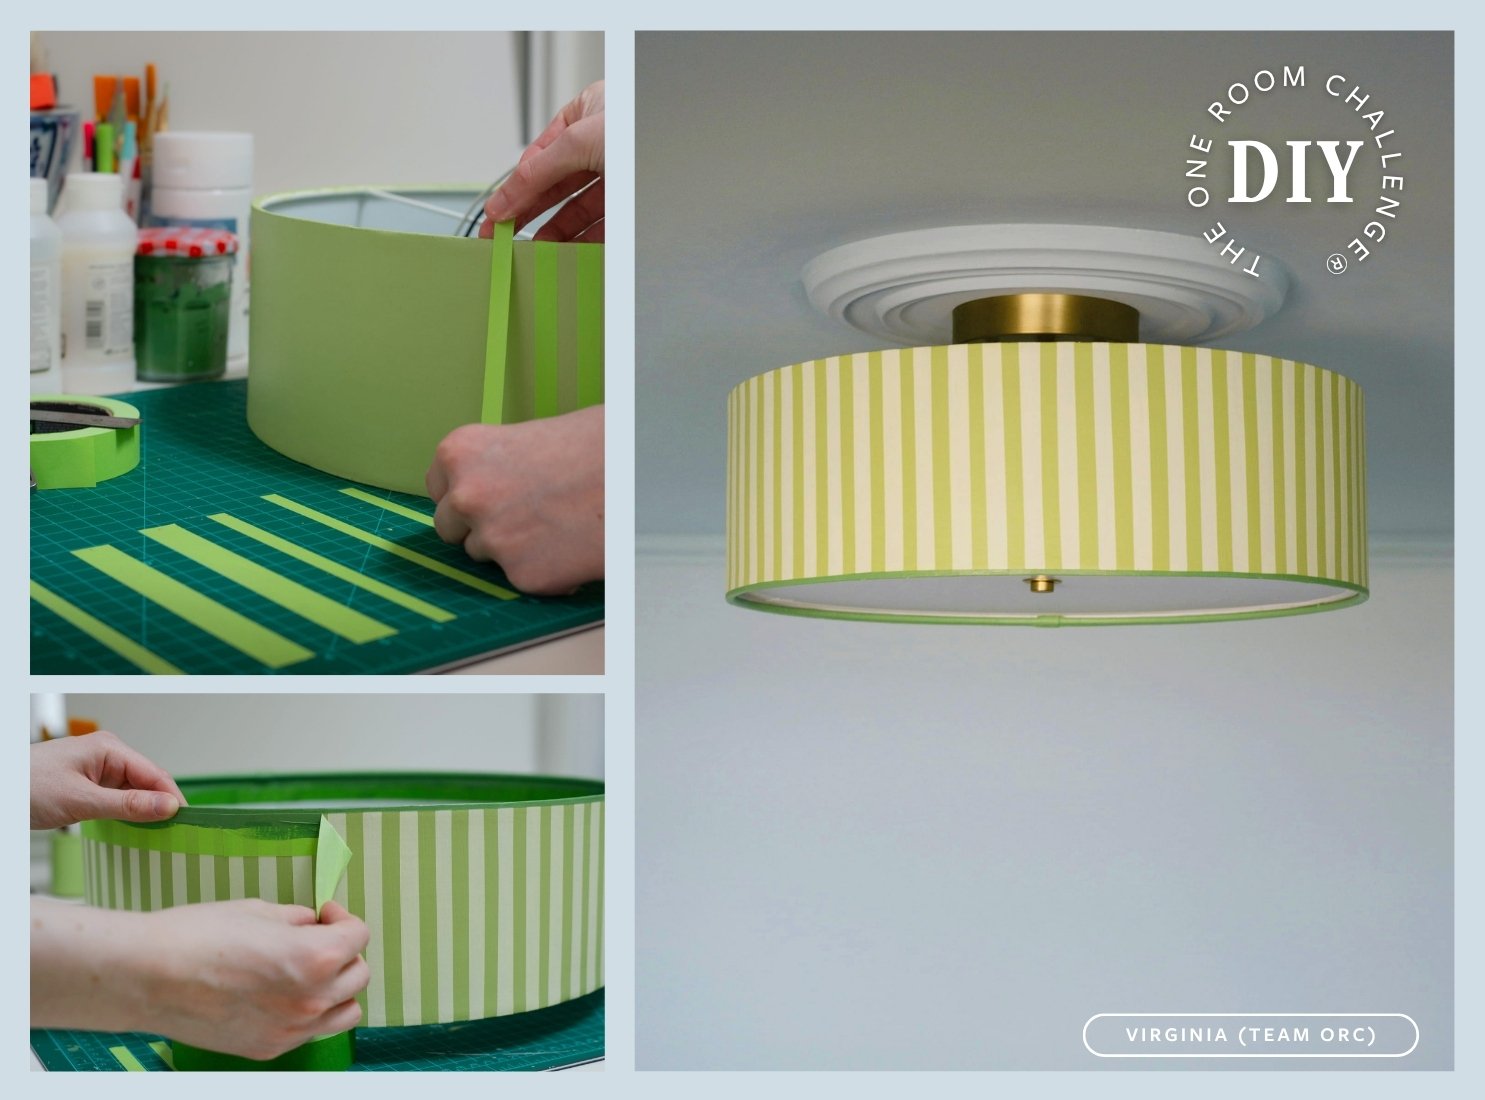
DIY: Incredible Dining Room Built-In Wall
DIY


VIA HENRIK JUNE HOME
Steph of Henrik June Home created this incredible built-in wall in her dining room during her spring ‘22 ORC project.
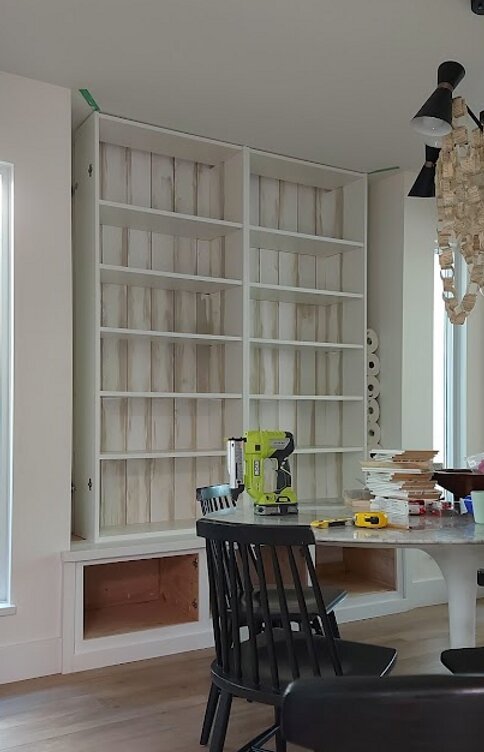
As you can see in the ‘before’ photo, Steph’s dining room previously had a nook of wasted square footage that was absolutely crying out for some built-in storage. Her goal was to create extra storage that could also serve as a focal point in this high-traffic area.
Although Steph is a lifetime DIYer, she considered herself a beginner woodworker and had never made anything of this scale. She was kind enough to share what she learned along the way of creating this gorgeous, mammoth built-in.
While a dining room built-in might not be on your project list, Steph’s insights and tips are a very worthwhile read for any beginner woodworker.
VIA HENRIK JUNE HOME
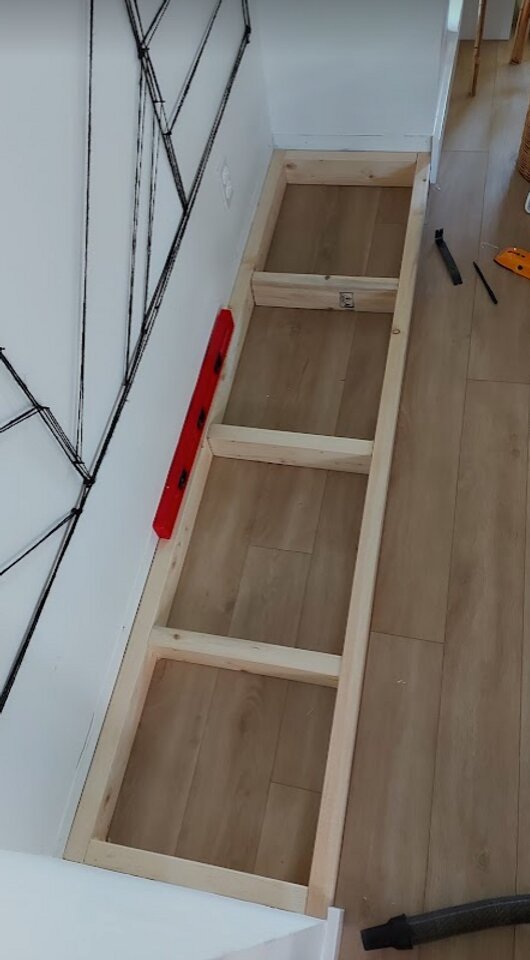
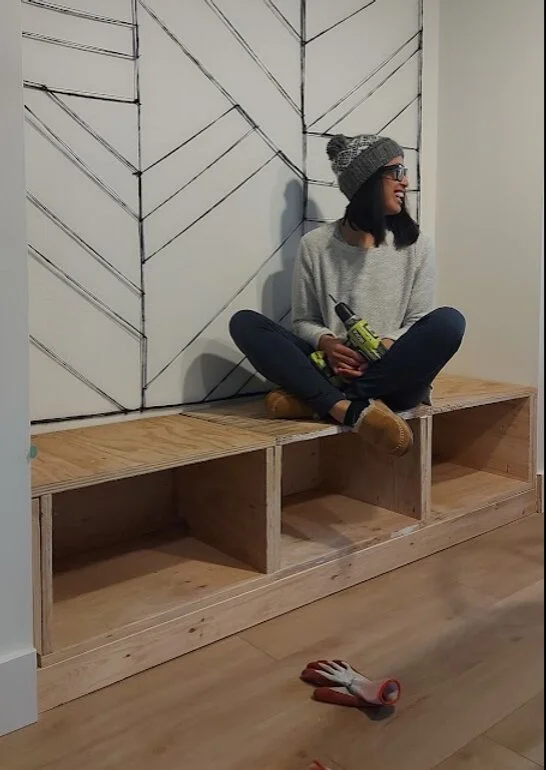
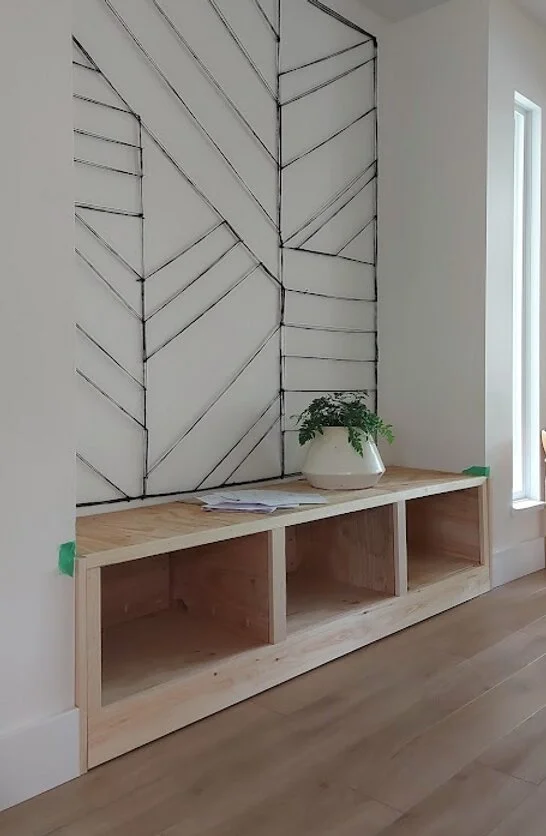
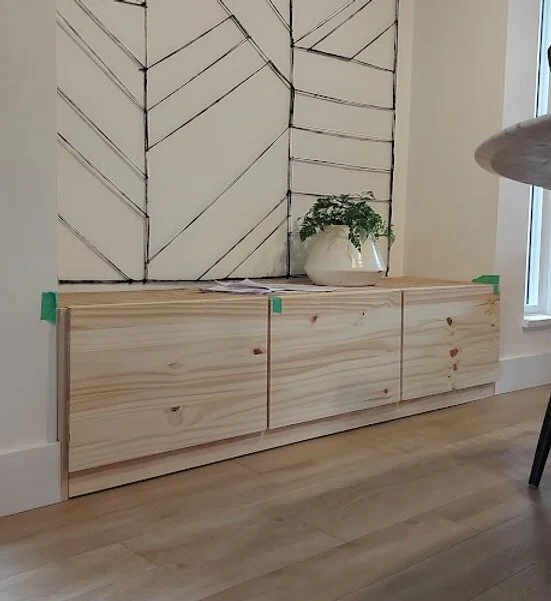
The only demo required was removing the baseboards where the built-in would go.
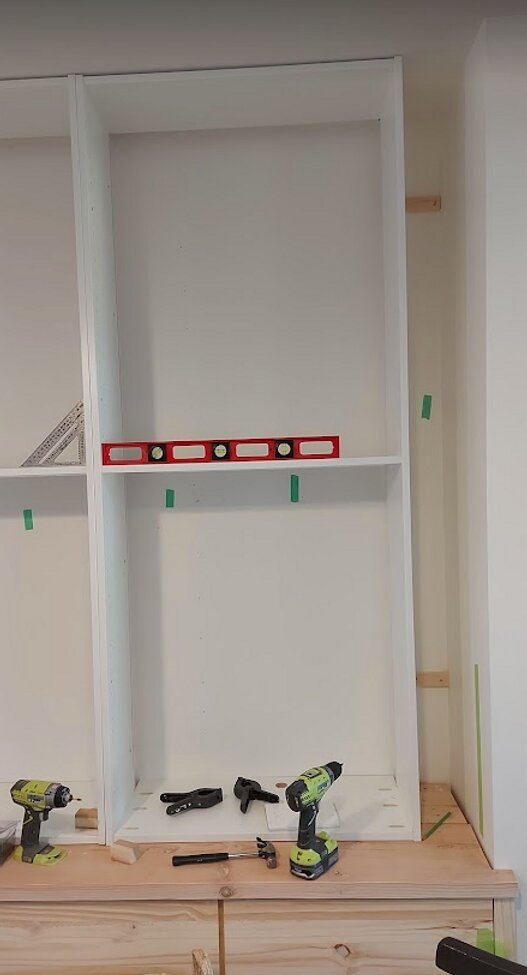
She kicked things off with a ladder base. Since the nook area isn’t perfectly square, Steph opted to measure, cut, and fit the ladder piece by piece. Then she attached it to the studs.
She also measured and cut the plywood for the boxes piece by piece, rather than building three equally sized boxes, again because the nook was not perfectly square.
Steph recommends using your carpenter square constantly as you build, because each step will be much easier if you have everything as square as possible.
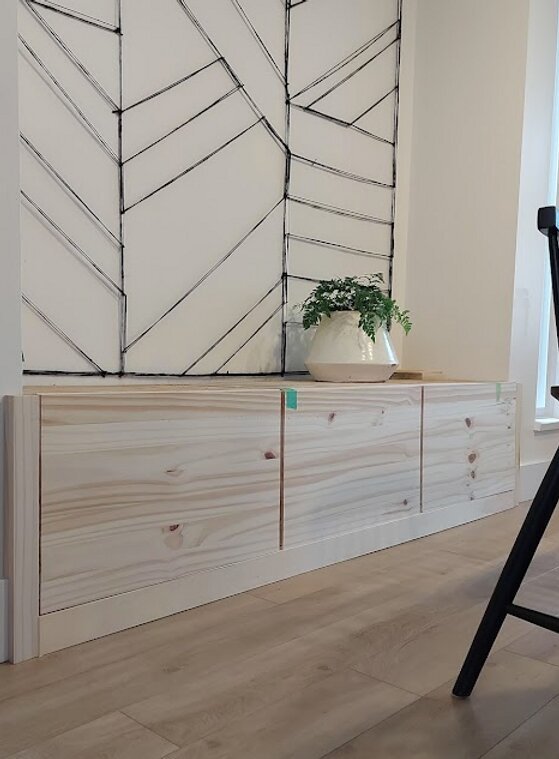
VIA HENRIK JUNE HOME
To measure for the overlay doors, she lined up her board against the cabinet and marked two lines at the midpoint of each middle stile. It took two passes through the saw to get them perfect, but thanks to the way she cut the doors preliminarily, she had the wiggle room to shave a little off. Better the first pass be too big than too little!
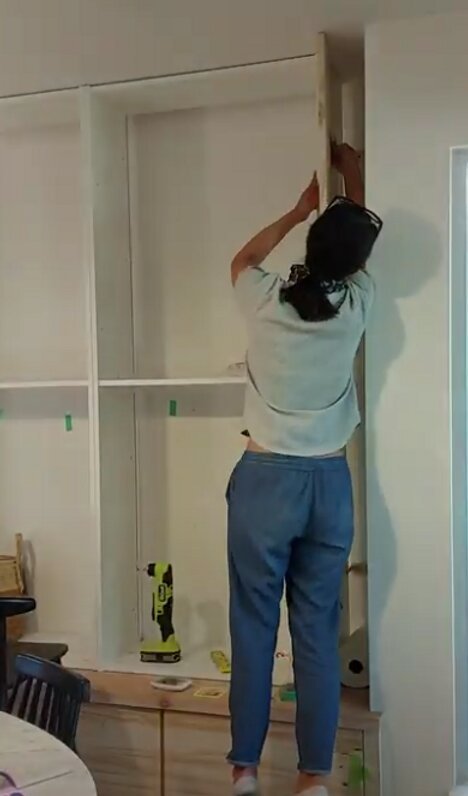
Then, she extended the trim over the walls on either side of the nook. This extra step gives it such an amazing custom look.
To make the countertop for the base, she brought her measurements to her local hardware store and had them cut the wood she bought. Her 10” table saw technically could have cut through the 2” fir, but the big hardware store saw was a safer bet for clean cuts.
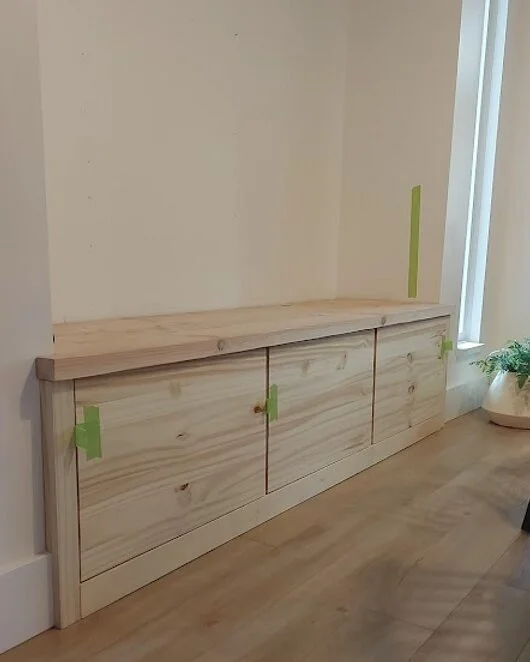
VIA HENRIK JUNE HOME
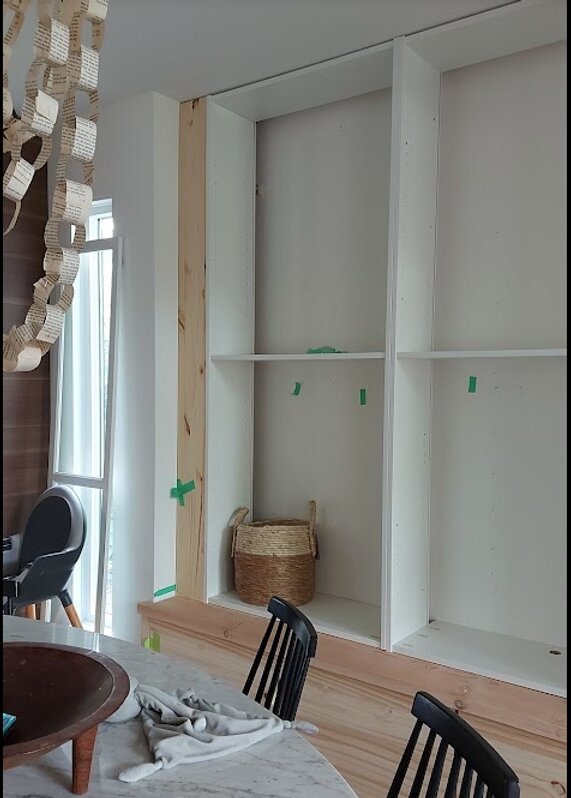
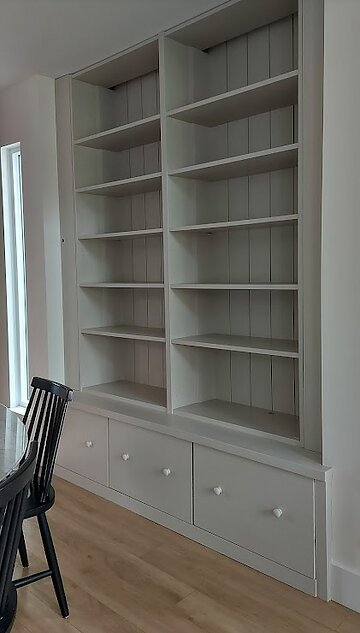
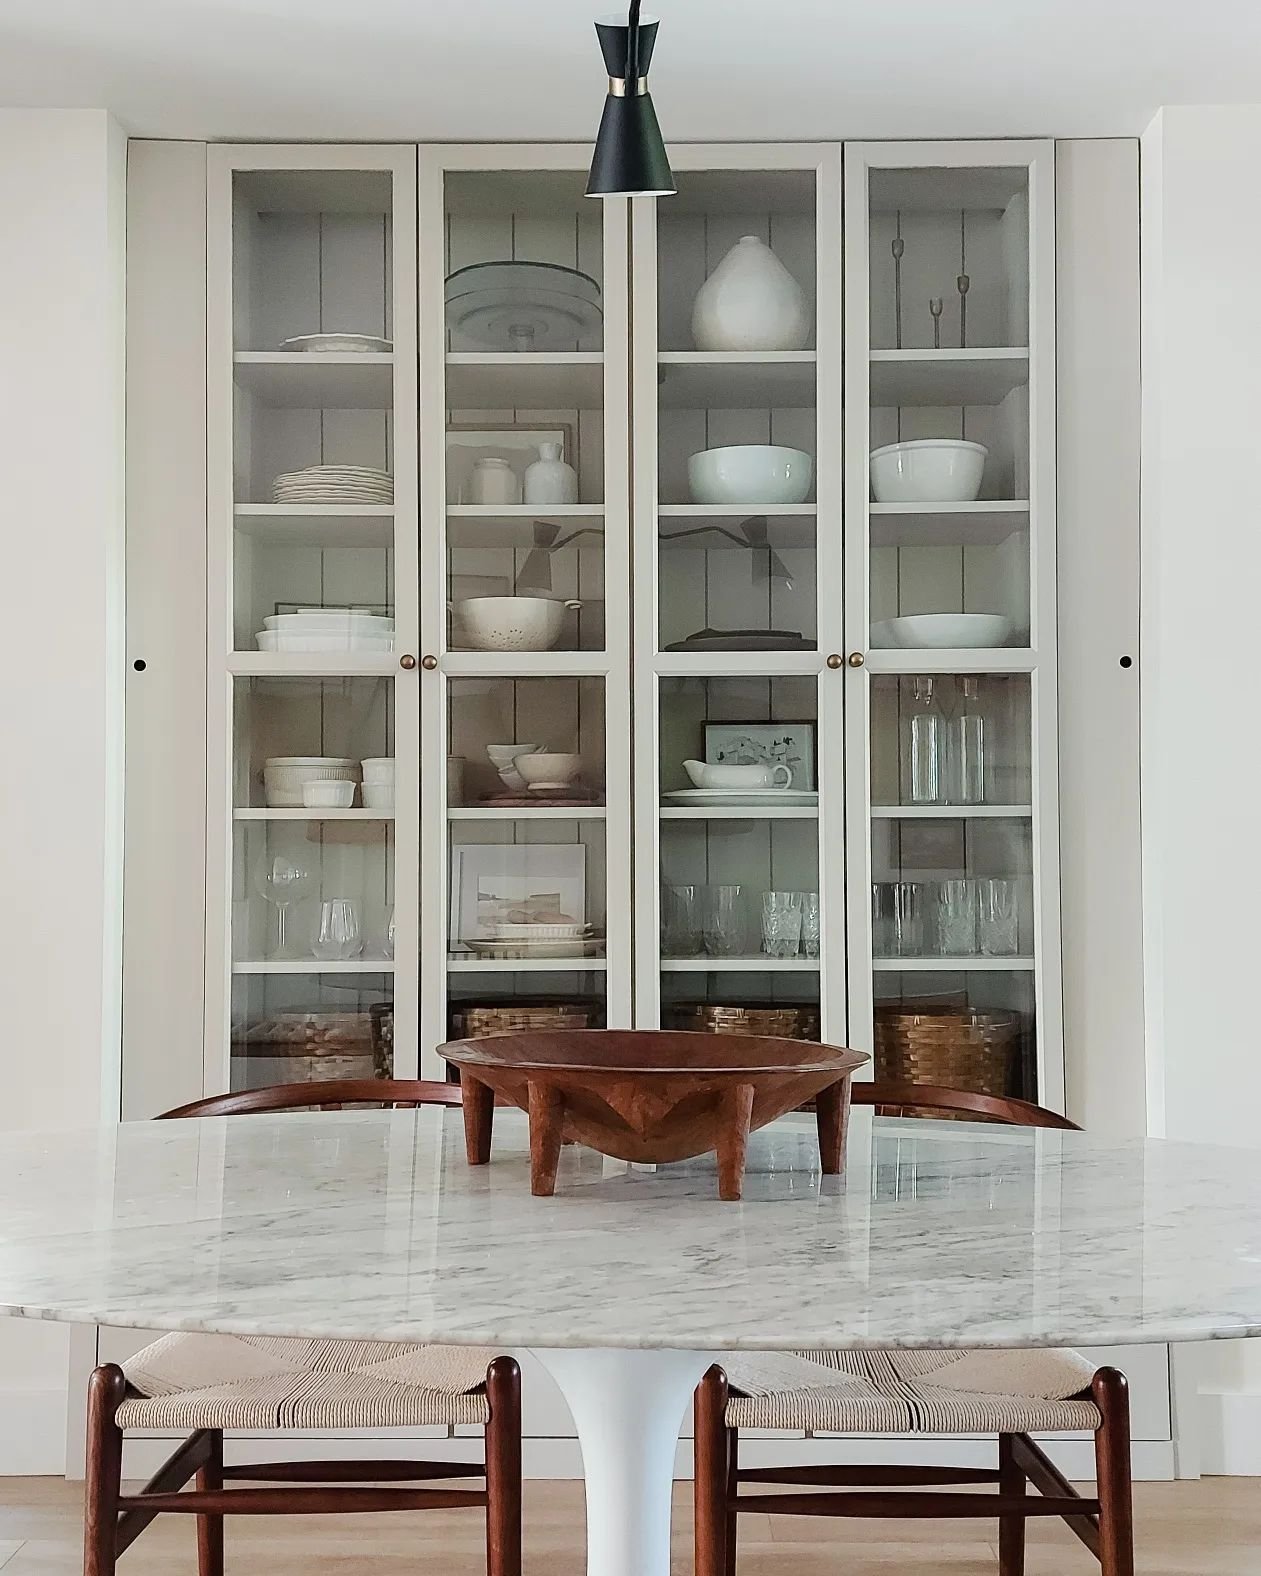
Next, it was time to tackle the upper section. Steph chose to use IKEA Billy Bookcases rather than building her own due to cost, timeframe, and lack of woodworking experience. The amount of plywood needed to build these would cost more than $300, and she found these Billy Bookcases secondhand for just $80. Also, Steph was mostly working on this project during her baby’s nap time. Thus, the IKEA hack was definitely the way to go.
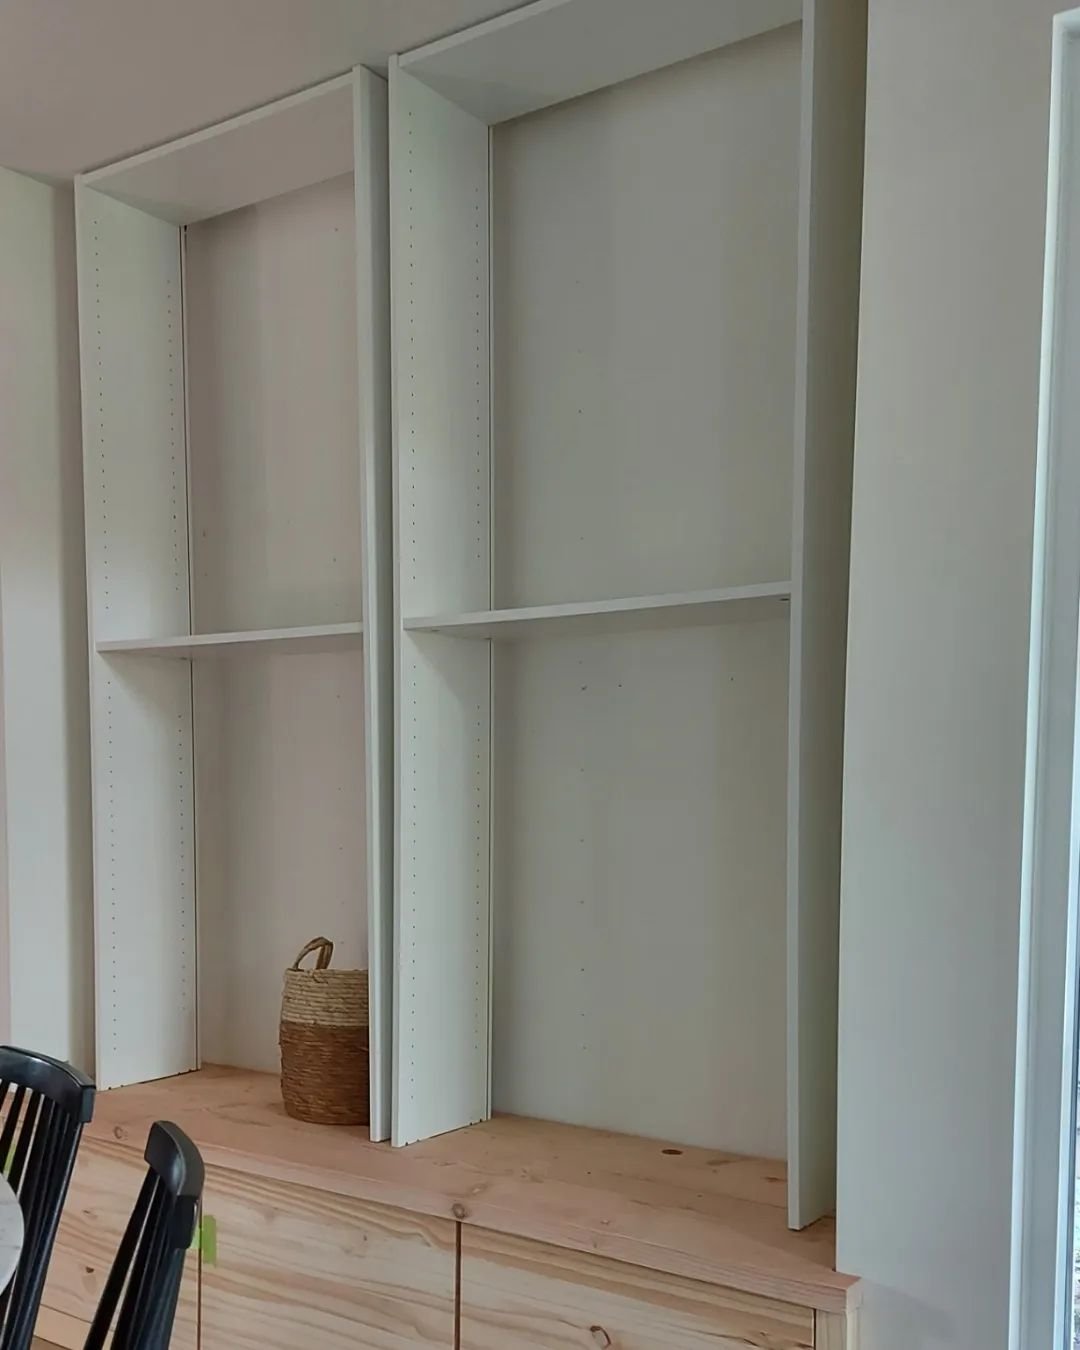
In order to make the Billy Bookcases not look like standalone bookcases, Steph cut the toekick section off the bottom of each one.
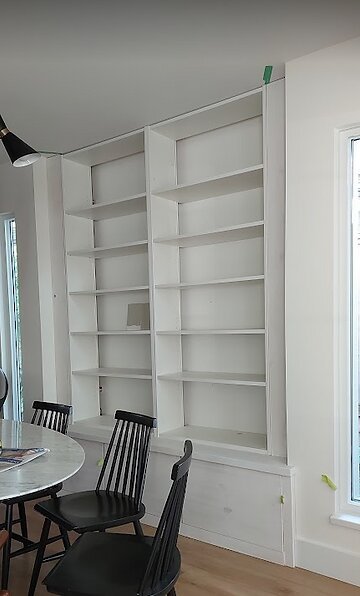
She also (ingeniously) used some extra Billy Bookshelf shelves to extend the depth of the existing shelves. This way, the shelves could accommodate bigger items like platters. She used pocket holes to connect the shelf pieces.
Then, she clamped the bookcases together and drove about ten 3/4" wood screws into the sides to connect them. She additionally created 4 L brackets out of scrap wood that secure the bookcases to the studs.
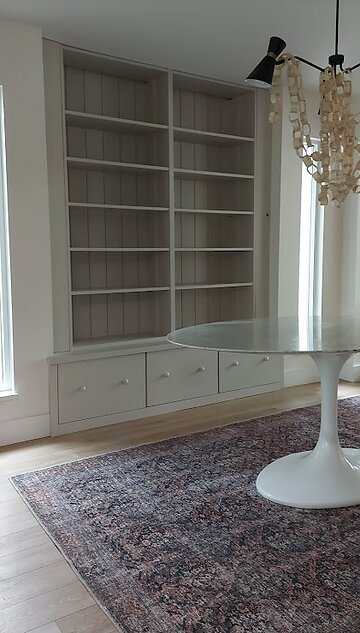
At this point in the process, she realized that the dead space on either side of the bookcases were the exact right size for storing rolls of paper towels. In order to create secret cabinet doors that would fit the not-perfectly-square nook area, she measured the width of the spacing between bookcase cabinet and wall every 10cm from ceiling to bench height. She used those measurement widths and made points down her board, connected those points, and made the cuts. Then, to make the pieces fit like doors, she sanded them each down 1/8” with her orbital sander. Finally, she attached them with inset hinges. Genius!
VIA HENRIK JUNE HOME
After making more extended shelves, the built-in was almost done. One crucial step was filling in all the shelf holes, which made the built-in look much more custom. She notes that this small step actually took several days due to wood fill drying slowly and needing multiple passes, so planning ahead was important.
Next, she primed everything. To prep the IKEA laminate for paint, she used 2 coats of shellac based primer and waited 2 days between coats for it to cure. She says that this primer is very smelly and a mask was a must.
The final main step was adding shiplap to the back of the shelves to give it some extra character and make it flow better with the rest of her home. Also, because she increased the depth of the shelves, she needed the shiplap to cover the resulting gap.
Steph highly recommends painting the sides of your shiplap boards before installing them, as it will save you many hours with a tiny brush. She attached the shiplap with wood glue and a pin nailer, and filled the pin holes with wood fill.
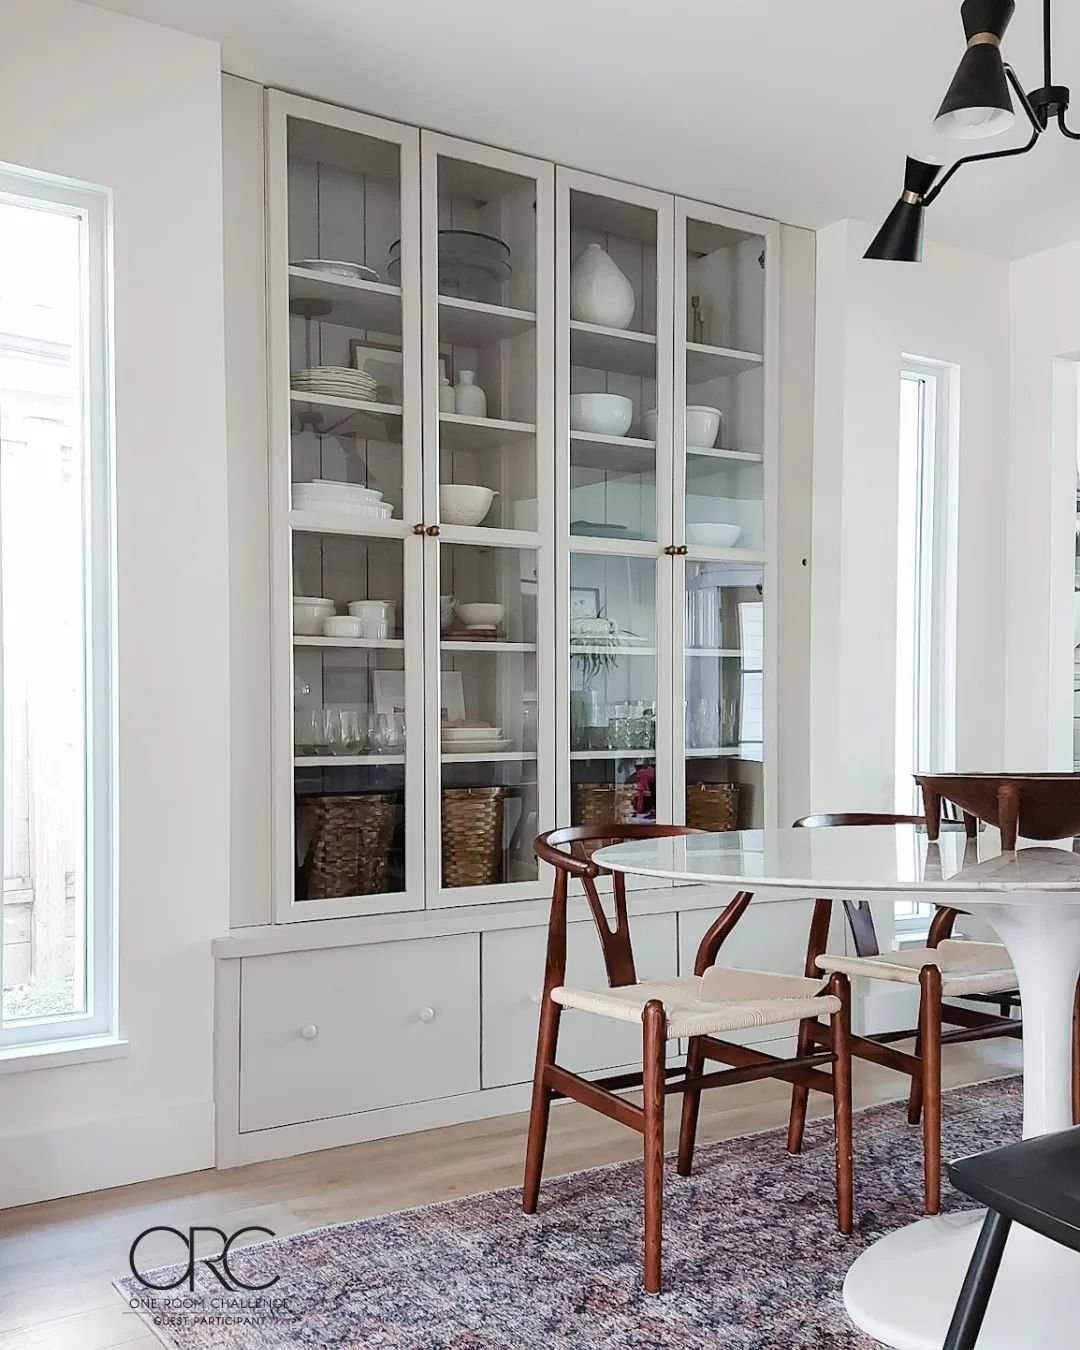
Next, she painted everything, sanding lightly with 320 grit between coats and using a tack cloth to clean the dust. She highly recommends painting the backs of the doors first, because willpower to paint the backs if the fronts are already done will be scarce. She attached her base doors, her secret paper towel compartment doors, and her Oxberg IKEA doors (made to fit the Billy Bookcase perfectly). The Oxberg doors are a worthwhile investment in saving yourself from lots of dusting in the future.
VIA HENRIK JUNE HOME
The finished product is simply incredible. In Steph’s own words:
“Is this built-in perfect? Nope. But, I can honestly say it exceeded my expectations. I learned so much from doing this build. Mostly, I learned to trust myself more.
What makes the process somewhat quicker and easier is planning and research.
If you have been following along with me for a while, you will know that I don't hide the fact that I'm uncertain of what I'm doing for almost every step of the way. I'm scared of saws, avoid loud noises and don't love creating a mess.
This built-in is a realization that I can accomplish more. To trust myself more. To lean into the uncertainties, because, these uncertainties help you stop and listen to yourself. Then address them through research, trial and error, practice... This all doesn't happen overnight. This happens over time and with failure. But, with these helping moments of uncertainties, incremental improvements over time, ongoing learning and a willingness to fail - things work out. They better than work out. They exceed your expectations and surpass the expectations you've laid out for yourself. Not to sound too corny here, but, this built in is a coming of age moment for me...a feeling that I'm just getting started.”
If you want to read more about Steph’s process, she wrote this incredibly detailed and helpful post about this project.
We want to feature your amazing DIY projects! Send us photos or videos from your One Room Challenge® project via this form.