Game-Changing DIY Upholstered Headboard DIY That’s Easy, Affordable, and Stunning
DIY
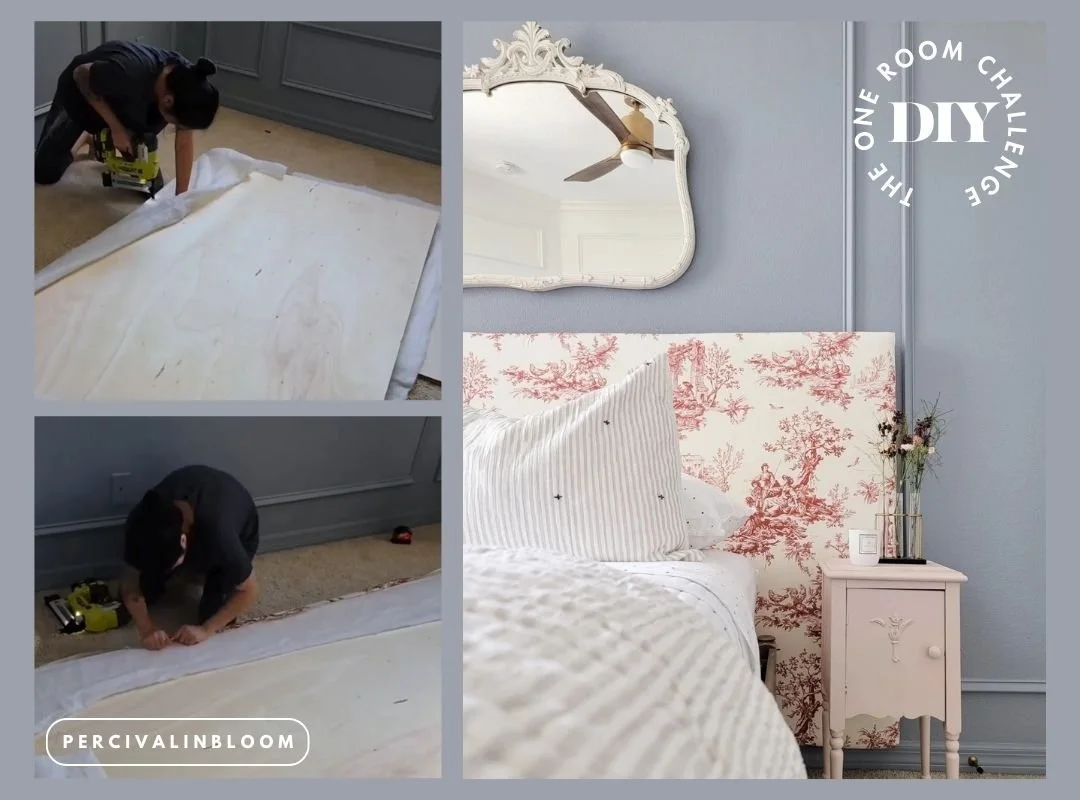
Van of Percival In Bloom created this stunning DIY upholstered headboard as part of her guest bedroom makeover during the spring ‘22 ORC.
The project and Van’s step-by-step tutorial could not be more straightforward and beginner-friendly, so the possibilities for creating something creative and custom for your space are endless.
Per Van’s tutorial, the supplies you’ll need are a piece of plywood cut to the size you want your headboard to be, 1 inch foam, spray adhesive, batting, a staple gun, and your fabric of choice.
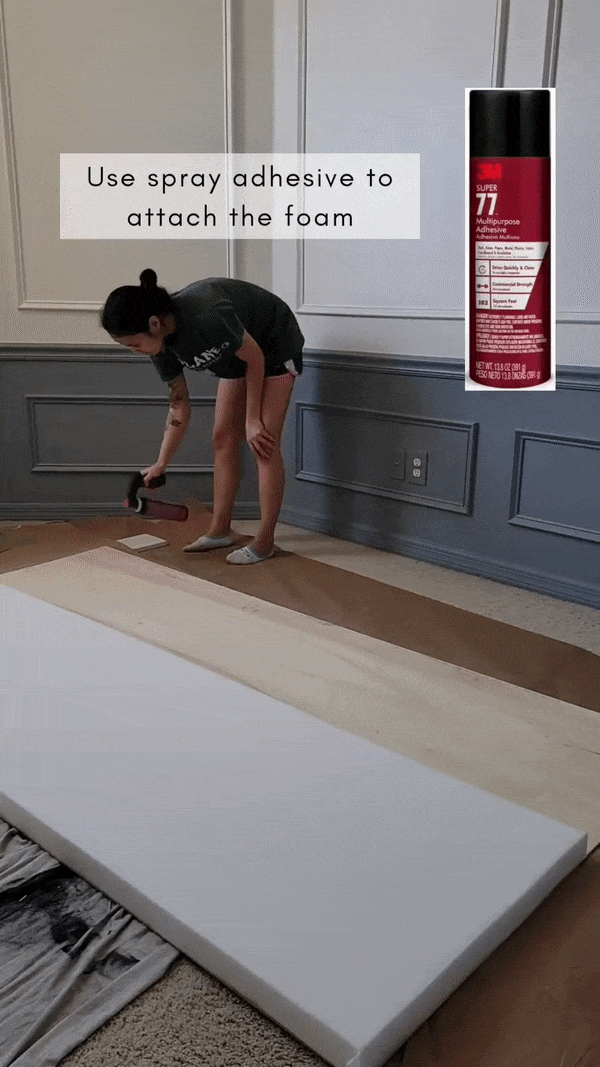
Start off by attaching your foam to the plywood with some spray adhesive. Nothing to it but spraying and sticking.
Also, don’t forget to put something under your project to protect your floor.

Then make sure the edge of the foam is nice and flush with the plywood. Van cut her foam down with a meat cleaver.
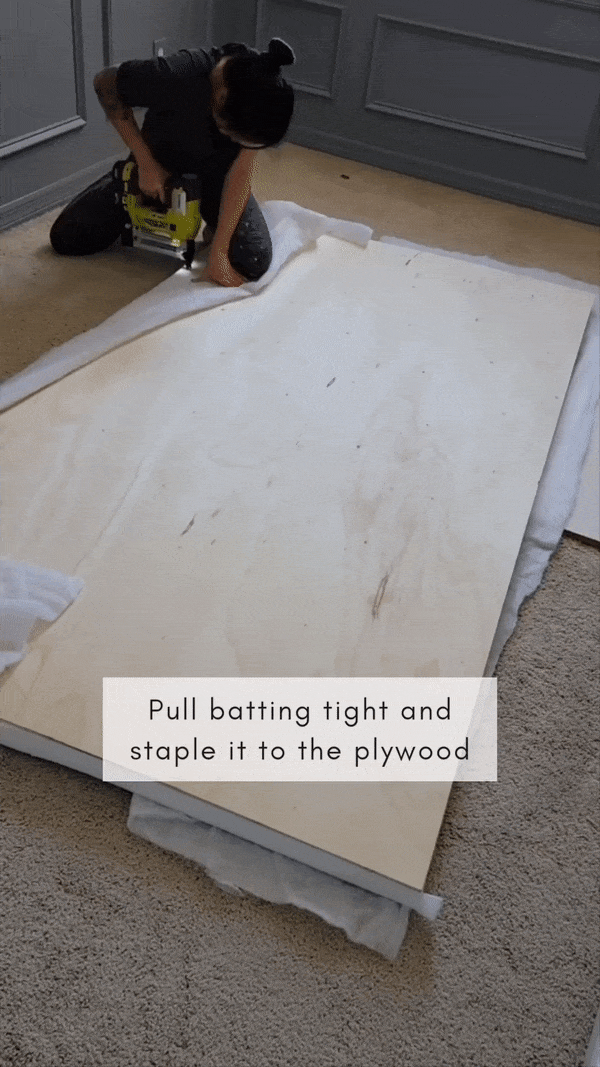
Believe it or not, you’re already halfway done with your headboard. The next step is attaching all your batting to the headboard by pulling it tight over the foam/plywood base and stapling it with the staple gun.

Now it’s really coming together! Next, staple your fabric to the headboard. Making the corners look neat is probably the trickiest part of this whole project. If you’re struggling, try looking at tutorials for stretching a canvas for painting.

And finally, all that’s left is to mount the headboard to the wall!
Van’s finished headboard is absolutely stunning and looks perfect in the space.
Would you ever have thought making your own upholstered headboard would be so easy and affordable? If you want to get fancy with it, you can even try cutting the plywood and/or foam into a special shape. It’s that simple to create your dream headboard that’s completely custom and unique to you!
We want to feature your amazing DIY projects! Send us photos or videos from your One Room Challenge® project via this form.